Google Ads is one of the most powerful online advertising platforms in the world. Every day, millions of people search on Google to find products, services, and information. By using Google Ads, you can show your business directly to the right people at the right time.
For beginners, setting up the first Google Ads campaign can feel confusing. There are many settings, options, and terms that may sound technical. But don’t worry. In this guide, I will explain everything in easy words. By the end, you will know exactly how to create your first Google Ads campaign step by step.
Why Use Google Ads?
Before we start with the steps, let’s quickly understand why Google Ads is useful:
- Reach more customers – Your ads can appear on Google Search, YouTube, Gmail, and millions of websites.
- Target the right audience – You can choose who sees your ads based on location, age, interests, and even keywords they search.
- Flexible budget – You don’t need a big budget. You can start with a small amount and increase later.
- Measurable results – Google Ads gives detailed reports, so you know how your money is being spent.
Step 1: Create a Google Ads Account
To get started, you need a Google Ads account. Here’s how:
- Go to the Google Ads website.
- Click on Start Now.
- Sign in with your Gmail account (or create one if you don’t have it).
- Enter your business details, like country, time zone, and currency.
Now your account is ready.
Step 2: Choose Your Campaign Goal
When creating a new campaign, Google will first ask you to select a goal. Goals help Google understand what you want to achieve. The main goals are:
- Sales – If you want people to buy products online or offline.
- Leads – If you want people to fill out forms, call you, or sign up.
- Website traffic – If you want more visitors on your website.
- Brand awareness – If you want more people to know about your business.
- App promotion – If you have a mobile app and want people to install it.
👉 For beginners, “Website traffic” or “Leads” is usually a good choice.
Step 3: Select a Campaign Type
Next, Google will ask you to pick a campaign type. These are the most common:
- Search Campaign – Ads appear when people search on Google. Example: If someone searches “best laptop,” your laptop ad may appear.
- Display Campaign – Ads appear on websites, apps, and Gmail. These are usually banners or images.
- Video Campaign – Ads appear on YouTube before or during videos.
- Shopping Campaign – Great for e-commerce stores selling physical products.
- Performance Max – Ads run across all Google platforms automatically.
👉 For your first campaign, I recommend starting with a Search Campaign because it’s easier and more targeted.
Step 4: Set Up Campaign Settings
After selecting the type, you will see some campaign settings. Let’s break them down:
a) Campaign Name
Give your campaign a clear name like “Website Traffic – September 2025.” This will help you track campaigns later.
b) Networks
Google may ask if you want to include Display Network along with Search. For beginners, uncheck this option and focus only on Google Search.
c) Locations
Choose where you want your ads to show. It can be worldwide, by country, city, or even a custom area around your business. Example: If your store is in Lahore, you may only target people in Lahore.
d) Languages
Choose the language your customers speak. If you are targeting Pakistan, you can select English and Urdu.
e) Budget and Bidding
- Budget: This is the average amount you want to spend per day. For example, if you set $10/day, Google will not spend more than $300/month (approximately).
- Bidding: This tells Google what you want to focus on. The most common options are:
- Clicks (good for website traffic)
- Conversions (good for sales or sign-ups)
Step 5: Choose Your Keywords
Keywords are the heart of Google Ads. A keyword is the word or phrase people type into Google when searching.
Example: If you sell shoes, your keywords may include:
- buy running shoes online
- best sports shoes
- affordable sneakers
How to Find Keywords?
- Use Google’s Keyword Planner (a free tool inside Google Ads).
- Think like your customer – what would they type in Google to find you?
- Choose a mix of specific and general keywords.
👉 Pro tip: Avoid keywords that are too broad (like “shoes”) because they may waste money. Instead, use more specific ones (like “buy running shoes in Karachi”).
Step 6: Create Your Ad Groups
Ad groups help you organize your ads and keywords. Each ad group should focus on a specific theme or product.
Example for a shoe store:
- Ad Group 1: Running Shoes (keywords: buy running shoes, best running shoes)
- Ad Group 2: Formal Shoes (keywords: black leather shoes, office shoes for men)
This makes your campaign more organized and effective.
Step 7: Write Your Ads
Now comes the creative part – writing your ad. A Google Search Ad has three main parts:
- Headline – This is the most important. You can write up to 3 headlines (30 characters each). Example: “Buy Running Shoes Online.”
- Description – You can write up to 2 descriptions (90 characters each). Example: “High-quality sports shoes with free delivery. Order now!”
- Final URL – This is the page where people will go after clicking. Example: www.example.com/running-shoes
👉 Tips for writing good ads:
- Use clear and simple words.
- Highlight benefits (“Free shipping,” “Discounts available”).
- Add a call to action (“Shop Now,” “Sign Up Today”).
- Match the ad text with your keywords.
Step 8: Add Extensions (Optional but Useful)
Ad extensions make your ad more powerful by adding extra information. Some useful ones are:
- Sitelink Extensions – Add links to other pages like “Contact Us,” “About Us,” or “Shop Now.”
- Call Extensions – Add your phone number so people can call directly.
- Location Extensions – Show your business address on the ad.
These extensions increase clicks and improve performance.
Step 9: Review and Launch
Before publishing your campaign, review all the details:
- Check your budget and bidding.
- Make sure your keywords are correct.
- Double-check spelling in your ads.
- Ensure your website is working properly.
Once satisfied, click Publish. Congratulations! 🎉 Your first Google Ads campaign is live.
Step 10: Monitor and Improve
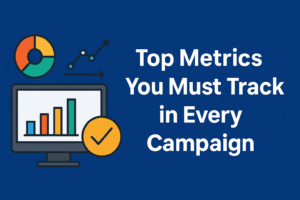
Launching the campaign is just the beginning. To get good results, you must monitor and optimize.
- Check performance: See how many clicks and conversions you are getting.
- Pause poor keywords: If some keywords waste money without results, pause them.
- Test ads: Try different headlines and descriptions to see what works best.
- Adjust budget: Increase spending on ads that perform well.
👉 Remember: Google Ads is not “set and forget.” It requires regular adjustments.
Common Mistakes to Avoid
Many beginners make simple mistakes. Here are some to avoid:
- Using very broad keywords like “shoes” or “clothes.”
- Not setting a daily budget, which can overspend.
- Sending traffic to the homepage instead of a relevant landing page.
- Writing ads that do not match what the customer is searching for.
- Ignoring reports and not checking results.
Final Thoughts
Creating your first Google Ads campaign may look difficult at first, but once you follow these steps, it becomes easier. Start small, test different ads, and learn from the results. With time, you will get better and achieve more success.
Google Ads is a powerful tool that can help you grow your business, increase website traffic, and reach more customers. The key is to stay consistent, keep learning, and always focus on giving value to your audience.